This doesn’t work all the time esp, but it makes volumes of speedline series a little less painful…
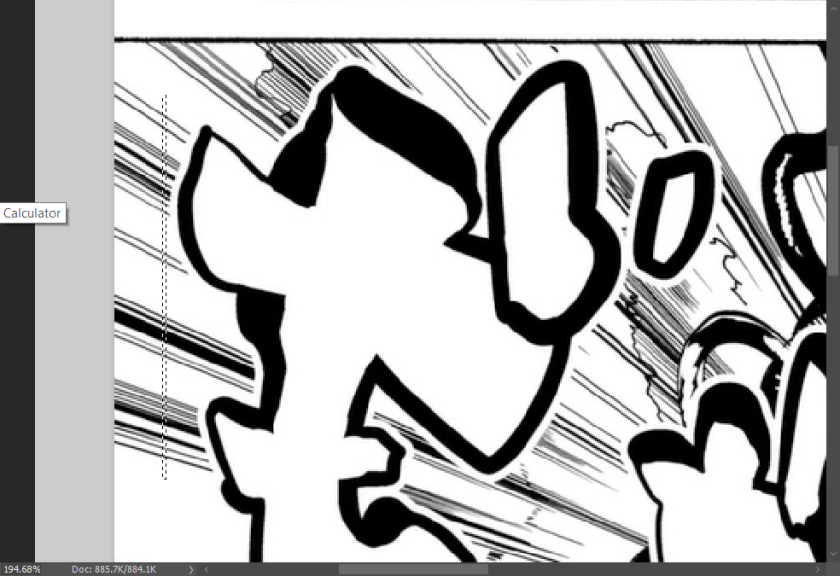
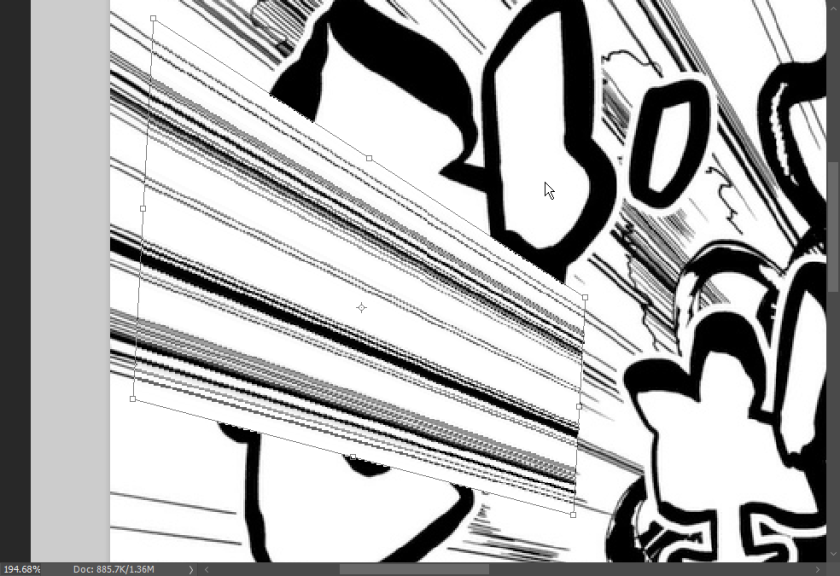
ctrl+J a shittonne of times if the end becomes semi transparent 
This doesn’t work all the time esp, but it makes volumes of speedline series a little less painful…
ctrl+J a shittonne of times if the end becomes semi transparent
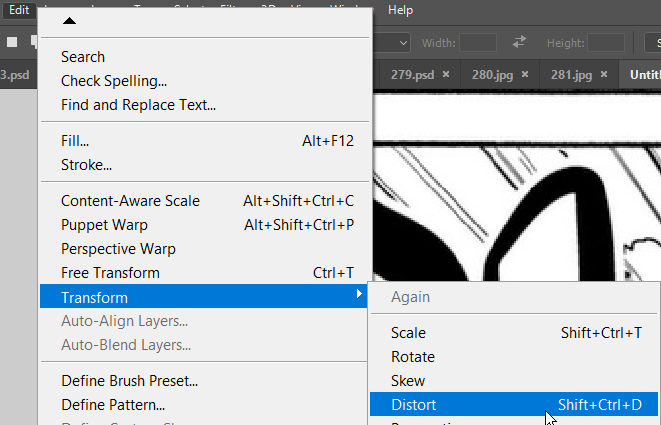
Random tip, but you can 100% use puppet warp on text. just convert it to a smart object first, warp, then sharpen with USM
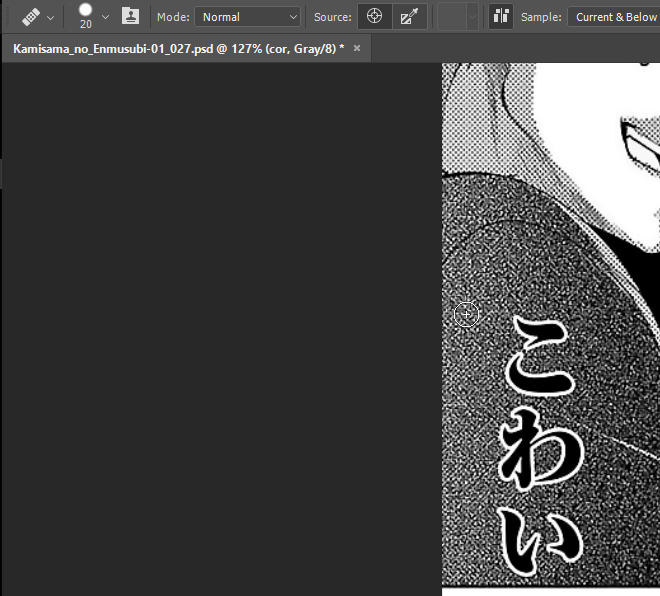
Are you a clone-stamp fan that always get frustrated when there’s a gradient? Perplexed by burn/dodge not blending in perfectly? For snow-like or spiderweb patterns, give the Healing Brush a try.
You can find Healing Brush nested in the toolbar with the rest of the content-aware tools, such as Spot Heal and Patch Tool (Shift + J {to cycle through tools}).
After selecting the Healing Brush, check your options in the top options bar to make sure that the mode is set to Normal, the source is Canvas (not Pattern), and the Alignment option is toggled on.
Diffusion controls how much the surrounding color and luminosity can bleed into the part you’re brushing. This option can change depending on what you’re working on, but keeping a low number works more universally.
Make sure that you’re still working nondestructively by working on a copy of the clean (select the clean layer, then Ctrl + J) or on a new, empty layer (Ctrl + Shift + N).
Just like the clone stamp, choose a sample with Alt + left click.
Working with the Healing Brush is rather forgiving of gradient, but unlike other Content-Aware tools and Content-Aware Fill, it won’t fix pattern alignment for you.
Use this tool in long strokes, and try to brush over as much of the area as you at one time without lifting up the mouse. This allows the diffusion to output as smooth of a gradient as possible.

Simple as that, repeat until the entire area is covered.
TROUBLESHOOTING:
If unwanted details are touching the area and causing diffusion mistakes, use clone stamp first around the offending edge to create a correct-color-border, and then proceed with the healing brush.
On a final note, newer versions of Photoshop render the output of Healing Brush in realtime. It’s not impossible to work with the tool in CS versions, but if you have the means to update to CC, that’s one of the features that’s really nice to have.
I’m personally not a big fan of clipping mask because it’s difficult for me to tell where the edges are.
So something I do when I want to clone stamp an area with a sharp angle or a straight edge is I first make a new layer, then make a selection of the redraw area:
This is a pretty traditional way to redraw speedlines with clone stamp:
-I’m going to set the clone stamp to “Current & Below” and enable Alignment.
-Alignment option locks the offset distance to the first point you click. If you disable it, clone stamp returns to sample from the original source every time you click. Try it for yourself!
-I’m going to sample with ALT+click on the speedline just before the redraw area, then line it up with lines I want to redraw.
By making the selection first, we avoid clone stamping over too much of the original art.
(video at 2x speed to due to old laptop lag >_>)
OKAY. So this is a new method that I just came up with for a page iZN1337 submitted.
Apologies for the lack of a video, since my laptop died, I can’t run a video screen capture application on the computer I’m working without it lagging to the point of being impossible to work with.
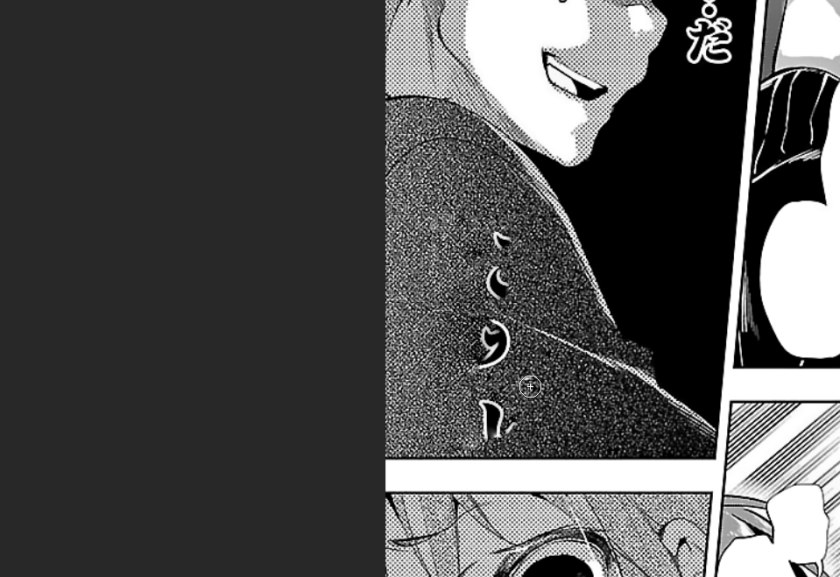
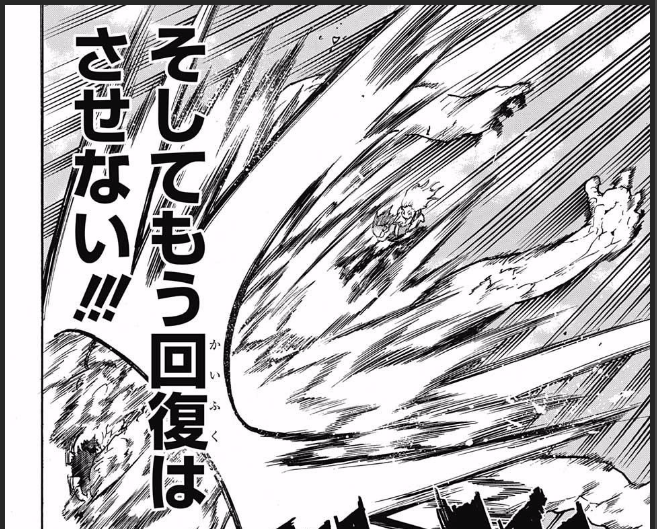
Izn’s question was specifically how to do speedlines over screentone.
The short answer is I don’t. I usually cheat, bringing the page to flat gray and then filling with artificial pattern. It saves a lot of time and the change is barely noticeable, albeit with some unavoidable detail loss. But the redraw will be invisible.
However, there are many groups with cleaners who would not appreciate a redrawer messing with clean. And that’s okay, they have every right to be opposed to that for obvious reasons because it is lazy and it is cutting corners.
The common way to do speedlines over patterns is to add in pattern fill either with a pattern fill layer or with pattern stamp tool, and then dodge/burning to match the rest of the art. This method relies on having a pattern on hand that matches the art perfectly, and on your dodging and burning skills.
There’s a couple things I don’t like about that traditional method. The primary reason is that this style of redrawing results in redraws that don’t blend in completely because the pattern is “too perfect” or simply doesn’t match.
This is where this new Low Pass Method comes in. Low Pass separates the details from the underlying tone, meaning we can clone the pattern from the page anywhere we want, independent of gradient. Additionally, since the pattern isn’t attached to the details, we can create smooth gradients without blurring or damaging the pattern!
So for this method, what we’re going to do is isolate the pattern from the tone, then fill the entire area with the separated pattern using content aware fill. Finally, we’re going to smudge the tone layer inward so we have a smooth transition between the original artwork and the redraw.
If I had to do this redraw for real, I see parts on the right of the page that I would use to copy/paste into place for a quick, git-er-done redraw. However, for the purpose of this tutorial, we’re going to pretend that the right side doesn’t exist so we only have a small area of pattern to sample from.
Phase one is to separate the pattern from the tone.
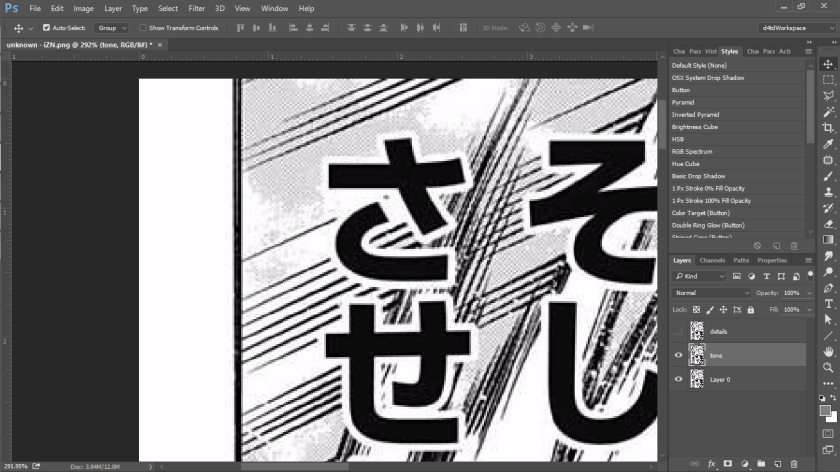
Make two copies of the clean. Name the top one “details” and hide it. Name the one beneath it “tone.”
Next, you’re going to want to “kill” the patterns on the tone layer. You can do this with a number of filters, including topaz clean with texture set to 0, or surface blur. I chose Median filter set to 1 (Filter > Noise > Median), because it was the best at preserving the distinction between light gray and white. The important thing is the details are gone, but the colors are still mostly in the correct place.
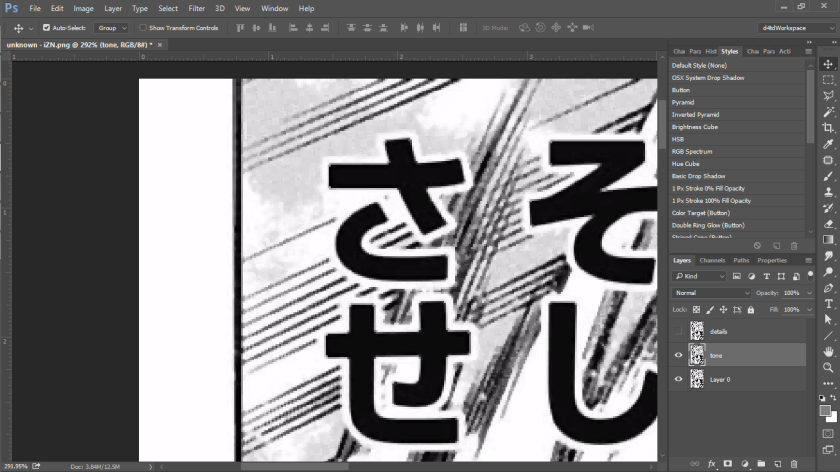
Enable the hidden details layer and go to Image > Apply Image.
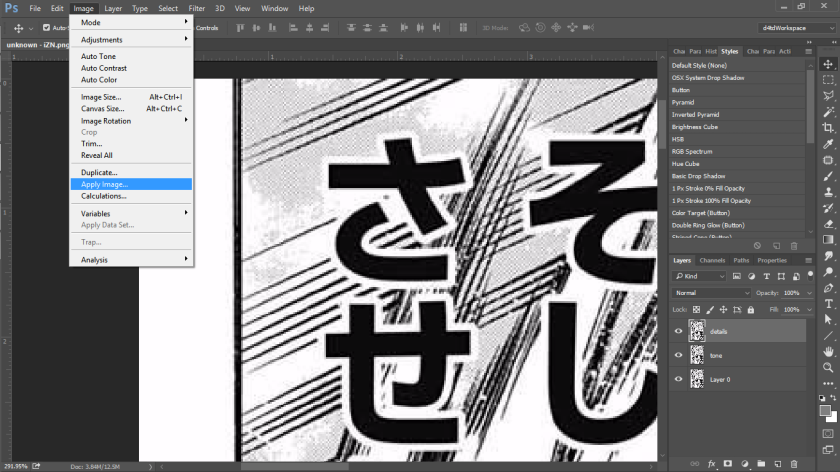
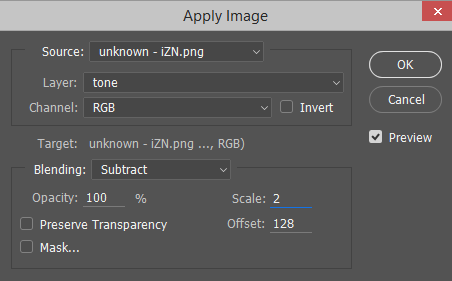
Makes sure the Layer is set to “tone” or whatever layer is the blur layer. Blending is Subtract. Scale is 2 because 2 is the max, 0 is the minimum. Offset is 128, because the RGB colors go from 0-255 and 50% gray is 128.
We’re telling Photoshop to subtract the layer without details (tone) from the original image and output the results to the current layer. This results in all the details on the details layer!!
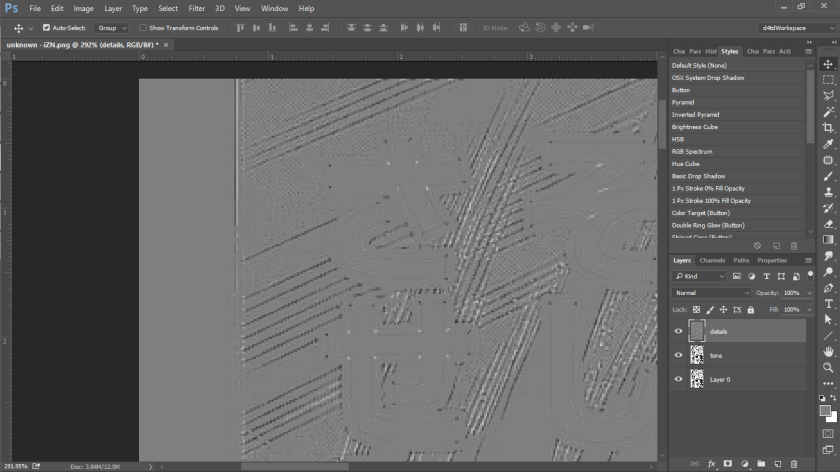
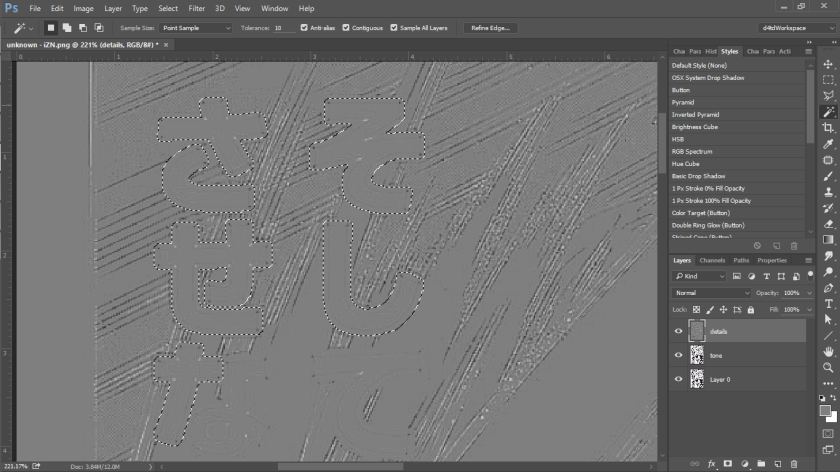
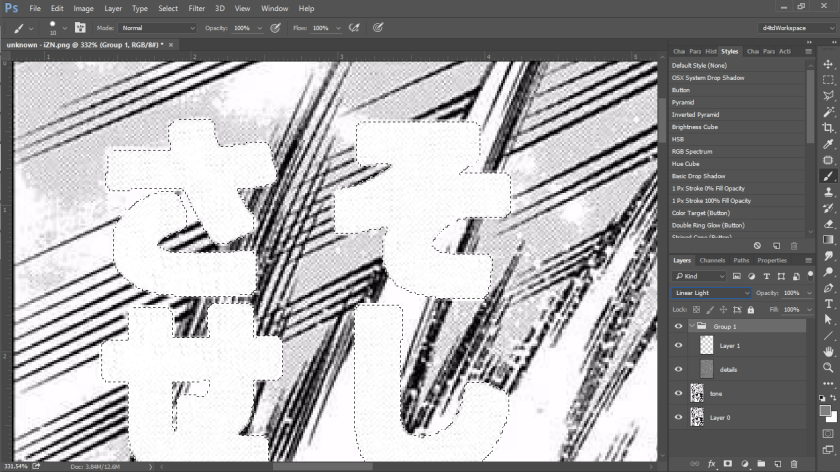
Perfect. (If we want to double check if we did this correctly, change the blend mode of the details layer to Linear Light. We should be back at the original image.) But lets just hide the details layer for now and select the raw text with wand tool.
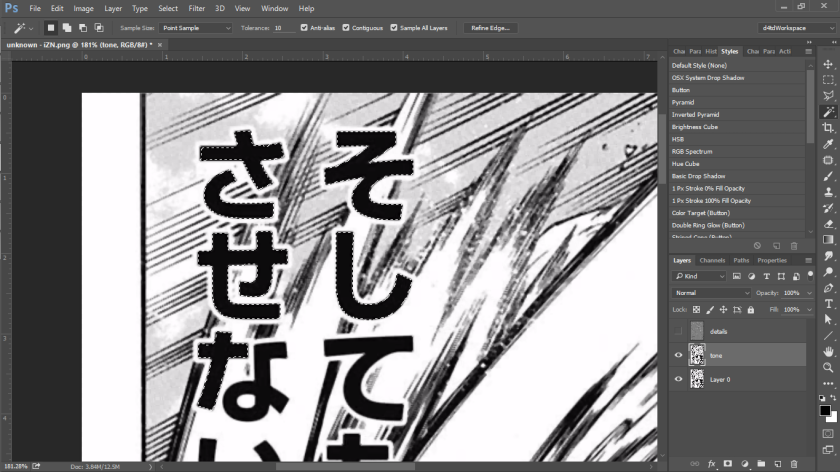
And expand the selection a bit to cover the stroke. Select > Modify > Expand.

And we can fill it with white. Remember that ALT+DEL is fill with foreground color, CTRL+DEL is fill with background color.
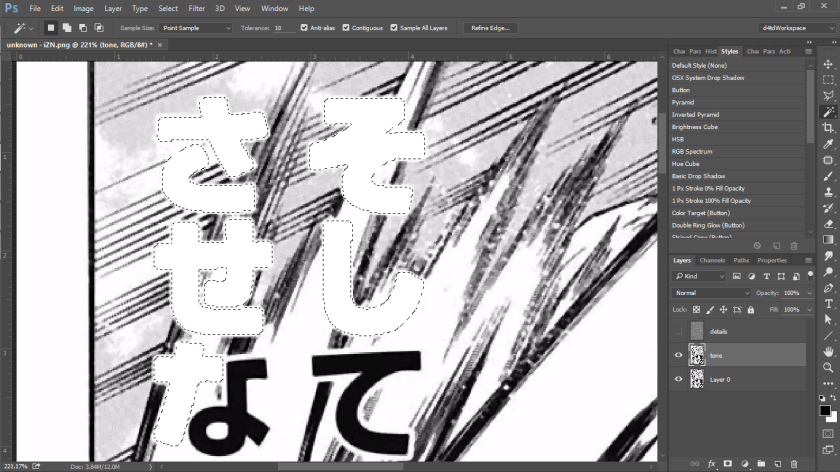
And we’re going to do the same thing with the gray details layer. You can find 50% in the color picker by typing “50” is the B box for Hue/Saturation/Brightness.

And fill.
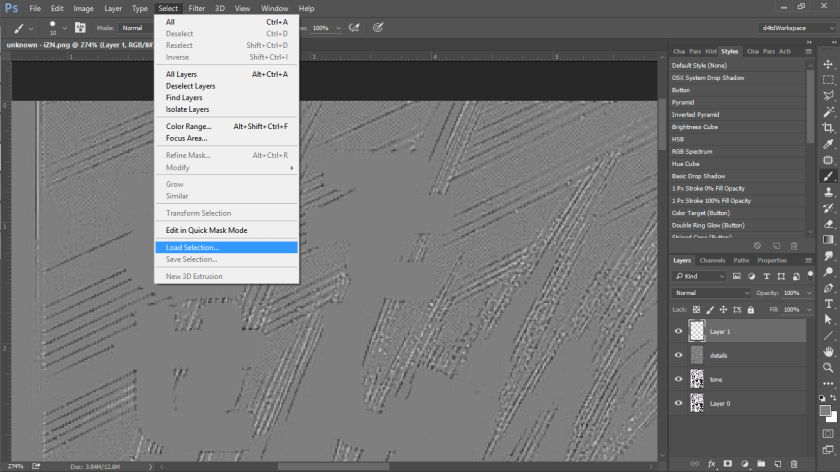
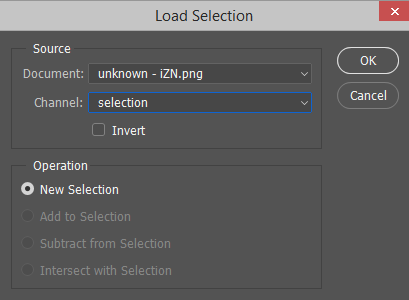
Let’s save this selection so we can come back to it later. We can do this either by clicking on the New Channel button in the Channels panel, or in Select > Save Selection.
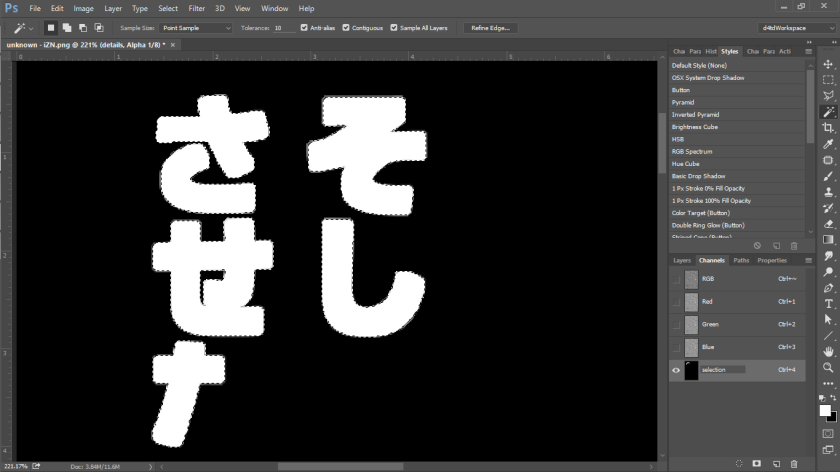
After we have selection saved, we can safely switch back to the RGB channel by left clicking it, then deselecting the selection with ctrl+D.
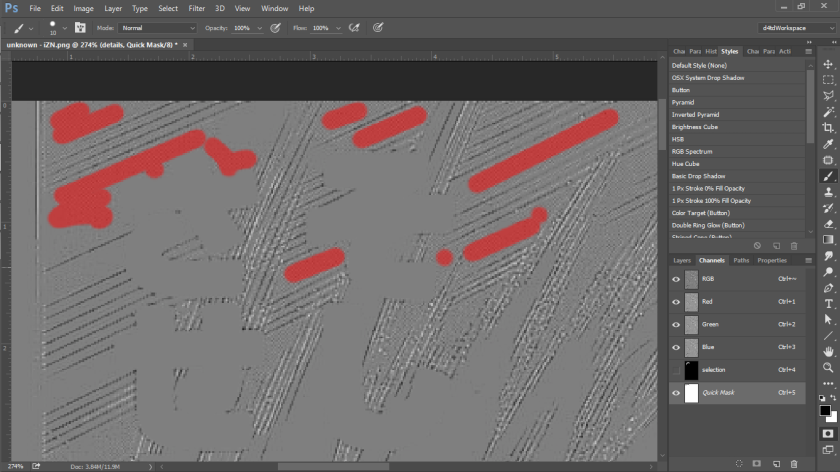
Next step, we’re going to pop into Quick Mask mode for the content aware trick.
Press Q to enter Quick Mask mode, then start painting over where the patterns are.
Press Q again to exit quick mask mode. (You may have to inverse the selection with ctrl+shift+I depending on your settings).
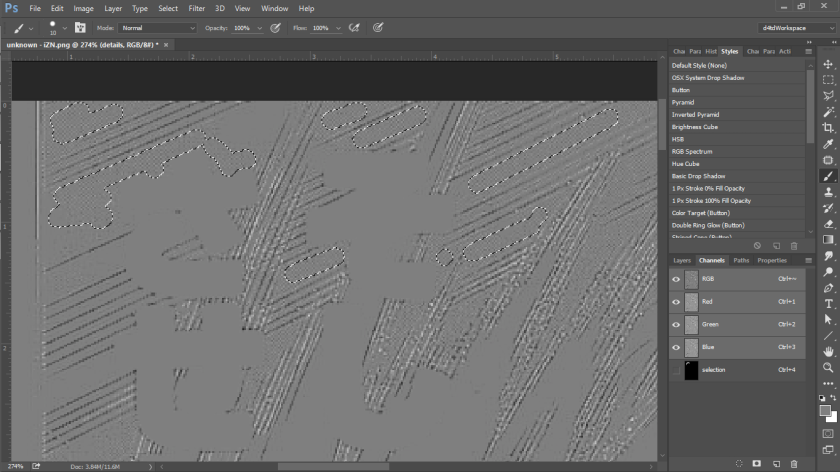
Pop this onto another layer with ctrl+J.
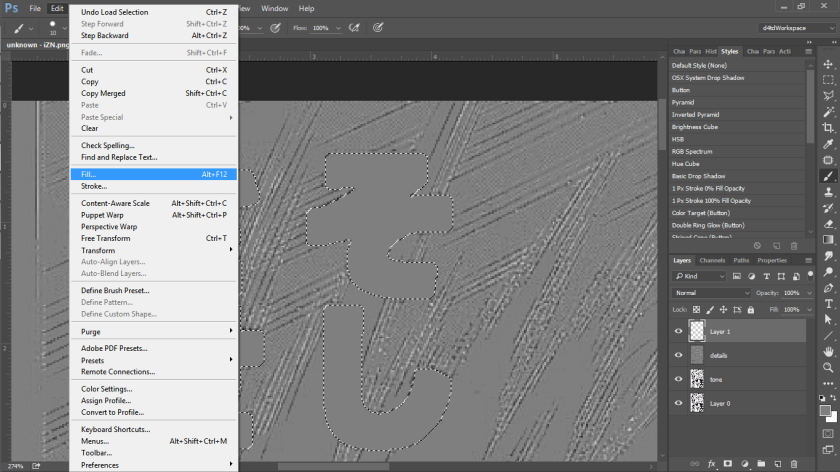
We’re going to bring back the text selection.
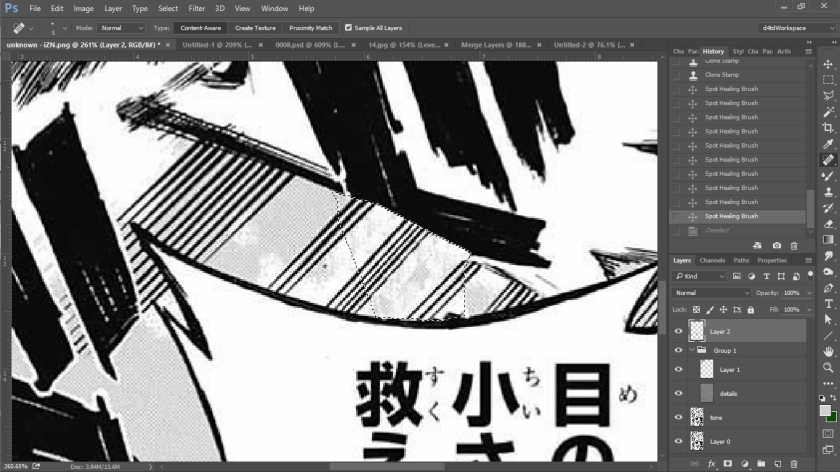
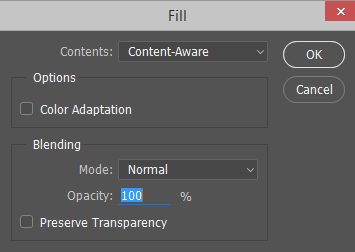
And then fill with content aware.

Move the details layer and the new layer into a folder. Now switch the blend mode on the group folder to Linear light.
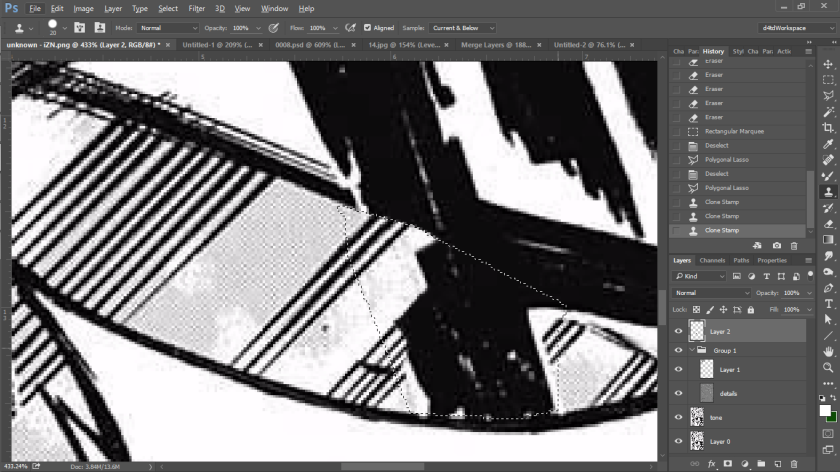
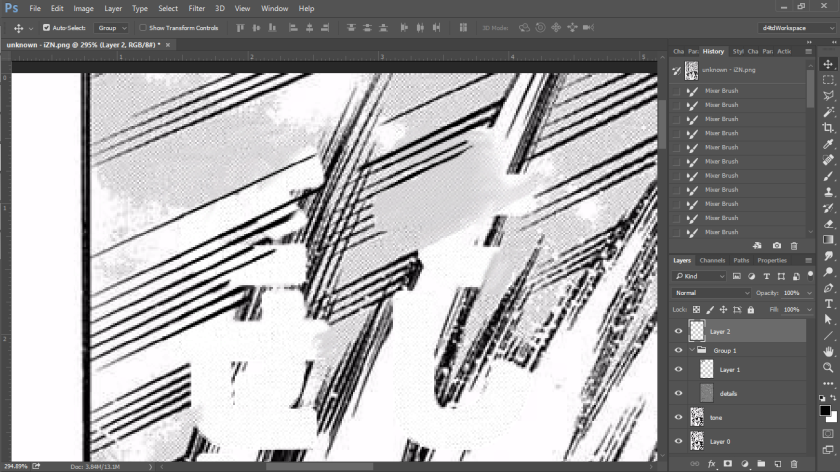
Finish the redraw by smudging the tone layer under the details layer with 100% strength smudge tool. You can blend transitions using the color mixer brush with clean the brush after each stroke enabled.

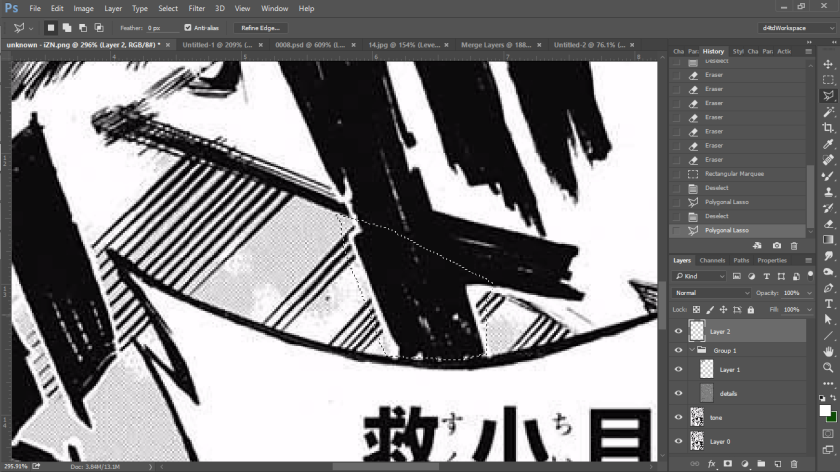
Finally, add in speedlines. I’m using polygon lasso method, but you can you brush, line tool, or even clone stamp if you want..
So yeah. This is a very needlessly complicated way to do a redraw, but one day, you might find yourself in a situation that you have to use it. The more options, the better(?)
(PS, a lot of these steps are actionable xD)
“Skin the Cat” is challenge that I often give redrawers when I’m either teaching one-on-one or testing for proficiency.
The rules are simple. Take a small redraw that you just did redo it without using the tool or method you used before. And do it again, and again, until you run out of ideas.
A lot of editors get comfortable with what they know. However, learning the nuances between different tool, filters, selection methods, and so on means that you’ll know the best and most efficient method when you come across that kind of redraw again. Also, when the method you’re comfortable with doesn’t work for some reason, you’ll have a method to fall back on.
Remember! This video is not inclusive of all the ways to do this redraw!
Find a page and try it out yourself!
A long time ago (before I was scanlating), Rain from Red Hawk Scans did a kickass tutorial. It has a boatload of examples and tips and pictures, and would totally recommend checking it out and the rest of the Red Hawk Scan tutorials if you can track them down (Use google).
I just wanted to again show that there are multiple ways of going about a redraw, as well as adding some notes about ways that I’ve learned to deal with redraws similar to the ones that he presents.
Rain has more drawing ability than I do, and he approaches things with a more traditional method mine.
If you’re starting out redrawing, start downloading public redraw tests from groups that offer them and give them a try, even if you have no plans to submit it. Seek out and read as many guides and tutorials as you can, but always question if there’s another way to solve a redraw that better suits you.
There’s so much more that stuff that I want to go over in more detail: speedlines, patterns, watercolor pages… and I will in the future. In the meantime, hopefully this gives you sense of perspective and encourages you to mess around with some of the cool features in Photoshop a little more!


PS I didn’t PR myself because the images are annoying huge and Tukimoop told me not to. Tell me where I fucked up and I’ll fix it.
Basically, the rules to remember with pen tool are that:
Now with subs!!
